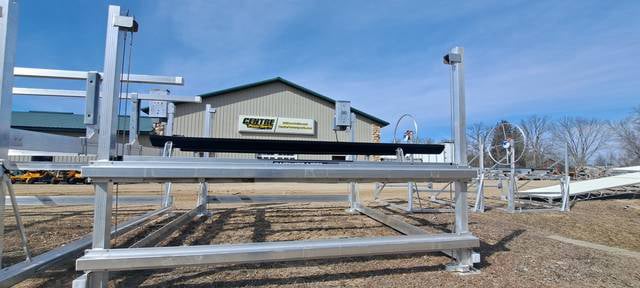
Uncover the essential steps to properly winterize your DIY boat lift, ensuring it's protected during the off-season – your key to a successful storage strategy awaits!
You've spent time and effort on your DIY boat lift, so ensuring it's properly winterized for the off-season is crucial. From protecting it against the harsh elements to checking for wear and tear, there are key steps you need to take. By taking the time to follow these essential guidelines, you'll be safeguarding your investment and ensuring your boat lift is ready for action when the warmer days roll around again.
Prepare your DIY boat lift for off-season storage by following these essential steps. Begin by thoroughly cleaning the lift to remove any dirt, grime, or debris that may have accumulated during use. Inspect the lift for any signs of wear and tear, focusing on the cables, pulleys, and frame for any damage that may need repair before storage.
Next, lubricate all moving parts to prevent rust and corrosion during the off-season. Apply a marine-grade lubricant to the cables, pulleys, and any other metal components that may be prone to rusting. This will ensure smooth operation and prolong the life of your used boat lifts for sale.
Once the lift is clean and lubricated, consider covering it with a waterproof tarp to protect it from the elements. Secure the tarp tightly to prevent water, snow, or debris from accumulating on the lift during storage. Additionally, if possible, store the lift in a dry, well-ventilated area to further prevent rust and corrosion.
Following these steps will help ensure your DIY boat lift remains in optimal condition for the next boating season.
To ensure optimal performance and longevity of your DIY boat lift, initiate a thorough cleaning and inspection regimen following these detailed guidelines.
Begin by cleaning all surfaces of your boat lift, including the frame, cables, pulleys, and any moving parts, using a mild detergent and water solution. Inspect the cables for any signs of fraying or corrosion, and replace them if necessary to prevent accidents during operation. Check the pulleys for smooth rotation and lubricate them if they show signs of wear. Examine the frame for any cracks or rust spots, addressing them promptly to maintain structural integrity.
Inspect the winch system for proper functionality, ensuring it operates smoothly without any unusual noises or resistance. Verify that all bolts and nuts are securely tightened and replace any that show signs of wear or stripping. Finally, test the overall operation of the lift by raising and lowering it several times to confirm smooth and consistent performance.
Additionally, consider using sacrificial anodes to protect metal parts from galvanic corrosion in saltwater environments.
Regularly inspect and clean the lift's electrical connections, applying a protective coating to safeguard against moisture and corrosion. By following these lubrication and rust prevention tips, you can ensure that your DIY boat lift remains in top condition and ready for use when the boating season returns.
When adjusting tension and alignment on your DIY boat lift, ensure that all cables are properly tensioned to maintain optimal performance and stability. Begin by inspecting all cables for signs of wear or damage, replacing any compromised cables to prevent issues during operation.
Utilize a tension gauge to adjust the tension of the cables evenly, ensuring they're all tightened to the manufacturer's specifications. Check the alignment of the lift beams and make adjustments as needed to guarantee that they're parallel and level. Misaligned beams can lead to uneven weight distribution and potential lift malfunctions.
Test the lift operation after making adjustments to confirm that the tension and alignment are correctly set. Proper tension and alignment are crucial for the safe and efficient functioning of your DIY boat lift, especially during the winter storage period when the lift will be supporting the boat's weight over an extended period.
Ensure proper winterization of your DIY boat lift by securely covering and fastening it for the colder months ahead. Begin by selecting a durable cover that fits snugly over the entire lift structure. A waterproof cover will shield the lift from snow, rain, and ice, preventing corrosion and damage.
Ensure the cover is securely fastened using bungee cords or straps to prevent it from coming loose in strong winds. Additionally, consider adding extra support by placing sandbags or heavy objects around the base of the lift to keep the cover in place.
Inspect all fastenings and connections on the lift and tighten any loose bolts or nuts to prevent movement during winter storms. Lubricate moving parts to prevent rust and ensure smooth operation when you uncover the lift in the spring. Finally, check the cover periodically throughout the winter to make sure it remains secure and undamaged.
Properly covering and securing your DIY boat lift will help protect it from the harsh winter elements and extend its lifespan.
To protect your DIY boat lift from harsh weather conditions, ensure regular inspections for rust or corrosion, secure all bolts and connections, apply protective coatings, and use weatherproof covers. Proper maintenance is key to prolonging your lift's lifespan.
To maintain your DIY boat lift, you'll need basic tools like wrenches, screwdrivers, and lubricants. Regular inspection of cables, pulleys, and fasteners is crucial. Keep the lift clean and well-lubricated to ensure smooth operation and longevity.
Inspect the lift cables every 6 months to ensure optimal performance. Look for signs of wear, fraying, or corrosion. Replace any damaged cables immediately. Regular maintenance prolongs your lift's lifespan and ensures safe operation for worry-free boating adventures.
Yes, you can customize your DIY boat lift with additional features to enhance functionality and meet specific boating needs. Options may include upgraded winch systems, remote control operation, or specialized bunks for different hull types.
When storing your DIY boat lift during the off-season, ensure the lift is thoroughly cleaned, all moving parts are lubricated, and electrical components are protected from moisture. Store in a dry, sheltered area to prevent damage.